Introduction: what you call a backup probably isn't one
One evening, you come home and Home Assistant no longer responds. The storage has died. Without warning, as always. The blinds won't close, the heating is doing whatever it wants, and above all, hundreds of hours of configuration have just gone up in smoke.
At this point, many people reassure themselves with a sentence I hear very often: "no panic, I have a RAID", or "it's synced to my cloud". I'm going to be direct, even if it stings a little: in both cases, what you call a backup probably isn't one.
The good news is that there is a simple, proven method, perfectly applicable to home automation: the 3-2-1 rule. Three copies, two media, one off-site. Each number plugs a specific gap, and none of them is there by chance.
So we are going to understand what you are really risking, dismantle the two most widespread false securities, then build together a Home Assistant backup that actually holds up, all the way to the restore test. Because a backup that has never been tested is not really a backup.
Transparency: this article is adapted from a video made in collaboration with Internxt and contains affiliate links, at no extra cost to you. The reservations and criticisms expressed here remain my own.
The real risk: what RAID and sync will never tell you
Home Assistant is not an app you reinstall in ten minutes
A mature home automation setup is not a piece of software. It's an accumulation. Your integrations, your automations, your dashboards, your scenes, your blueprints, your entities renamed one by one, three years of energy history, your API keys, your Zigbee pairings. Add up the evenings you have spent on it, you are going to get a little scared.
And all of that lives on a single storage device, in a box sitting on a shelf, next to the router.
eMMC, SSD, SD card: the silent countdown
An SSD can die overnight, without the slightest warning sign. But the trickiest case is the Home Assistant Green. Its storage is 32 GB of eMMC memory, a flash chip soldered directly onto the board, exactly like in a smartphone. Impossible to replace. And like any flash memory, it wears out with every write.
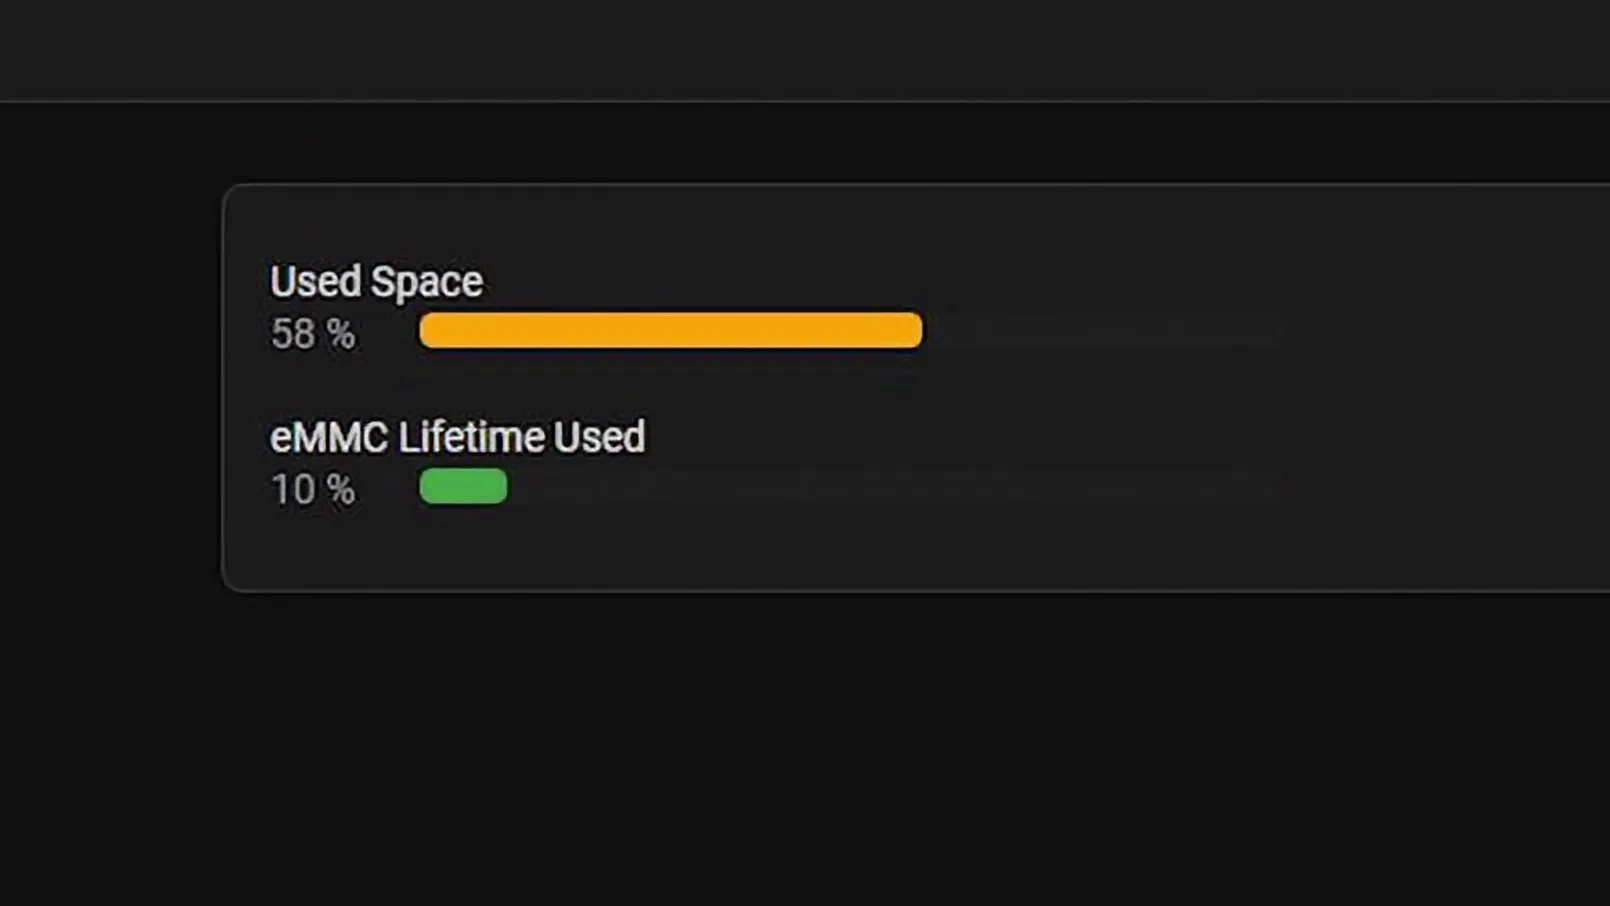
This is not a theoretical worry. On the official Home Assistant forum, you regularly come across Green owners who discover, just a few weeks after buying it, a wear indicator already at 10%. The reason is simple: Home Assistant writes constantly. Every state change, every sensor reading goes into the history database. Multiply that by a hundred sensors and by several years.
Two useful habits, independent of backups. Reduce history retention with the recorder's purge_keep_days option, and exclude the entities you never look at. And if you want to go further, move the data disk to an external USB SSD from Settings, System, then Storage. That last operation is not trivial, several users have seen their installation never come back: make a full backup and download it before you start, never after.
RAID and sync: two false securities
A RAID is several disks working together as if they formed a single one. In its simplest form, everything you write is copied live onto a second identical disk. Picture two secretaries sitting side by side: you dictate, they write the same thing at the same time. If one falls ill, the other has the complete document. But if you dictate something stupid, you end up with two copies of the stupid thing.
It is very clever, and it solves only one problem: the disk that dies. You delete a folder by mistake, the copy disappears within a second. Ransomware encrypts your files, the RAID faithfully encrypts the duplicate. RAID is service continuity, not backup.
Same trap with a synchronization service like Google Drive or Dropbox. What disappears on one side disappears on the other: that is the very principle of syncing, to mirror the current state and not to preserve the past state. So never confuse cloud sync with cloud backup, the distinction may well save you one day.
"I have a NAS in RAID 1 and everything is synced to my Drive, my data is safe."
You are protected against a single disk failure. Against accidental deletion, silent corruption and ransomware, you have strictly nothing.
So what is a real backup?
A real backup is a copy frozen in time, separate from the original, that nothing modifies afterwards. A photograph of your system at a precise moment, not a mirror of its current state. That is the whole difference, and it is this definition that justifies each of the numbers that follow.
The 3-2-1 rule: five threats, three numbers
The five threats you are protecting yourself against
The rule is not a dogma that came out of nowhere. It doesn't even come from IT: it was the American photographer Peter Krogh who formalized it in The DAM Book, published in 2005, to protect his image catalogs. Twenty years later, it has been adopted by ANSSI and by most cybersecurity frameworks. It answers five very concrete scenarios.
- Human error, the most underestimated and yet the most frequent: an automation overwritten, an update that breaks everything, one click too many at midnight.
- Hardware failure: the SSD or the eMMC chip giving up the ghost.
- Silent corruption: the database quietly degrading, which you only discover three weeks later.
- Ransomware: malicious software that encrypts everything it can reach on your network, backups included if they remain accessible.
- Physical disaster: fire, water damage, burglary, lightning.
Three numbers, three gaps plugged
3 copies of your data. If one backup is corrupted or has failed without you knowing, two others remain.
2 different media. If one machine fries, the other is still there.
1 off-site copy, meaning outside your home. If the house burns down, is flooded or burgled, or if ransomware sweeps the entire local network, the outside copy survives.
3-2-1-1-0, the modern version
In the professional world, the rule has gained two more numbers. The full formulation, popularized by the vendor Veeam, is written 3-2-1-1-0. You will also come across the shortened version 3-2-1-0: it's the same idea.
The first addition is an offline or immutable copy, one that ransomware cannot reach even with a grip on your network. In practice: a disk you unplug after the copy, a locked snapshot on the NAS, or a cloud with versioning that keeps the previous versions of a file.
The second addition, the zero, is zero errors in the restore test. And that is the one everybody forgets, myself first for years.
Putting it into practice: the local copy and the second medium
One clarification before we start. This guide assumes a Home Assistant OS installation, the most common case, and the one used by both the Green and the Yellow. On Home Assistant Container, the backup system exists but supports neither add-ons nor supervisor folders. You will also need a NAS or network storage accessible over Samba, a cloud account for the off-site copy, and above all a safe place, outside Home Assistant, to store your encryption key.
Step 1: the encryption key, before anything else
Since Home Assistant version 2025.1, all automatic backups are encrypted with AES-128 and the encryption key is no longer optional. On first configuration, Home Assistant generates it for you and offers to download an emergency kit that contains it.
Download that emergency kit. Really. As long as your instance is running, you can look the key up again at any time from the settings. The day the machine no longer boots, that option disappears, and your encrypted backups turn into a nice pile of unreadable bytes.
If you change the encryption key later, the old one remains essential to restore the backups already made. Keep both, and make a careful note of which backups each one corresponds to.
Step 2: the local copy, scheduling and retention
Still in the backup settings, click "Configure backups". Three settings really matter:
- The schedule: set it to daily, without hesitation. The "optimal time for the system" option works very well.
- Retention: whatever you do, don't leave it on "forever", your storage would be saturated within a few weeks. Three backups are enough locally.
- The content: the Home Assistant settings are mandatory. Add the add-ons and the history. The share and media folders, only if you know why, because they inflate the archive very quickly.
This first copy lives on the machine itself. It is obviously the most fragile location, since it disappears along with it. But it is also the one that will save you most often, in three clicks and without downloading anything, on the evening an update breaks everything.
Step 3: the NAS, your second medium
On the NAS side, the procedure is roughly identical across all manufacturers. Create a dedicated shared folder, for example ha_backups, then a dedicated user with the right to write in that folder, and in nothing else. Finally, check that the Samba file service is indeed active.
Back in Home Assistant, head to Settings, System, Storage, then "Add network storage". Enter the IP address of the NAS, choose the Samba protocol, provide the name of the shared folder and the credentials of the user created earlier. Once the network storage is connected, it automatically appears in the list of backup locations.
Enable it, then open its settings to give it a custom retention. Your NAS has room: set it to 30 backups. With one backup per day, that gives you a month to catch a corruption that went unnoticed. This is exactly where the difference between a backup and a mere copy plays out.
The off-site copy: choosing the right cloud for your backups
The landscape of destinations, in July 2026
Home Assistant has opened the floodgates considerably since the overhaul of its backup system. As I write these lines, you can natively send your archives to Google Drive and OneDrive (since version 2025.2), a WebDAV server (2025.3), Cloudflare R2 (2026.2), AWS S3, or Dropbox, which arrived with 2026.7. Not forgetting Home Assistant Cloud.
Let's talk about that one, precisely. It is the easy option, it funds the development of the project, and I have nothing against it. But let's be precise: budget 7.50 euros per month or 75 euros per year in the euro zone, and above all the official documentation is very clear, the space is limited to 5 GB and it keeps only a single file, the last backup uploaded. It is an excellent immediate emergency copy. It is not a history.
Internxt: a European cloud, open source and zero-knowledge
The file is encrypted on your machine, before it leaves. The host only stores unreadable blocks and holds no key: even it is unable to open your files.
Internxt is a Spanish cloud, therefore European and subject to the GDPR, whose clients are open source. Encryption happens client-side, each file is split into chunks spread across several servers, and the model is zero-knowledge. The Ultimate 5 TB plan is the one that unlocks the CLI and WebDAV, and that is exactly what we need here.
A necessary clarification, rarely stated: since 2025.1, your backups already leave encrypted with AES-128. Even dropped onto a consumer Drive, they remain unreadable without your key. Zero-knowledge is therefore not a catch-up, it is one more layer, where the host does not even know what it is storing. On the other hand, never disable encryption for a location that leaves your home: Home Assistant allows you to do so for destinations other than its own cloud, and it would be a very bad idea.
Installing the add-on and hooking up Home Assistant
Internxt's WebDAV is not a remote server: it is a local server, launched by their CLI, which encrypts before uploading. It therefore had to run inside Home Assistant. I packaged all of that into an add-on available in my add-on repository, compatible with amd64 and aarch64.
- In Add-ons, open the three-dot menu, then Repositories, and paste the repository address.
- Reload the page, scroll all the way to the bottom of the list, and install Internxt WebDAV.
- Enable two-factor authentication on your Internxt account, retrieve the TOTP secret, and create a destination folder, for example ha_backups.
- In the add-on configuration, enter your email, your password and that TOTP secret, then choose a username and a password for the local WebDAV server.
- Start the add-on, wait for the startup confirmation in the log, then copy the container URL displayed just above it.
- Finally, in Settings, Devices and services, add the WebDAV integration: paste the URL, the credentials of the local server, and the path to your folder, here /ha_backups.
This new location then appears in the backup configuration, exactly like the NAS. Enable it, set its retention to 30, and your 3-2-1 is complete.
My preference clearly goes to a European end-to-end encrypted cloud, and the lifetime offer really changes the equation as soon as you reason over five or ten years. Going through my link with the code HOWMATION, the lifetime Ultimate 5 TB plan comes to 500 euros excluding tax in a single payment, an 87% discount, and payment in several interest-free installments remains possible. Two reservations all the same, because I am not going to sell you a dream. Versioning only arrived at Internxt at the beginning of 2026, and its retention window remains short, around four weeks on the Ultimate plan according to PCWorld's testing. And a lifetime offer is only worth as much as the company's lifetime. That is exactly why the cloud remains one copy out of three, never the only one.
Security considerations: your backup is a keyring
Here is the point almost nobody talks about. Your archive is not an innocuous file. Inside it are your access tokens, your API keys, your integration credentials, and even your Wi-Fi password. Home Assistant says so itself when announcing its new backup system: these archives contain the keys to every device in your connected home. In other words, a real keyring to your home.
If that file leaks, someone can literally rebuild your installation and connect to it. Three very concrete consequences.
First, where you send that file matters enormously. That is the whole point of a host that is unable to open what it stores, and it is the real reason to prefer an end-to-end encrypted cloud over a consumer Drive.
Next, store the key somewhere other than in Home Assistant. A password manager is perfect for that, with one amusing caveat: if you self-host your Vaultwarden on the very Home Assistant you are trying to restore, you have just locked yourself out. Plan a copy outside that perimeter, on paper in a drawer or in a separate vault. That is not paranoia, it is common sense.
Finally, remember that ransomware that takes control of your network will also reach the NAS, since Home Assistant has the right to write to it. This is where the fourth number of 3-2-1-1-0 makes complete sense. Enable Btrfs or ZFS snapshots on the NAS, keep an external disk that you plug back in once a month, or rely on the cloud's versioning. It doesn't matter which of the three, but at least one.
The zero in 3-2-1-1-0: test it, otherwise it is only a hope
A backup you have never restored is not a backup. It is a hope.
Testing without playing the arsonist
In the video, I completely destroy my installation to prove that the restore works. It is spectacular, it is not what I advise you to do on a Tuesday evening.
The right method: install Home Assistant OS in a virtual machine, on an old Raspberry Pi or in Proxmox. Download your latest archive from the cloud, choose "Import a backup", tick everything, and enter your encryption key. Good news along the way, the restore works across architectures: a Home Assistant backup taken on a Raspberry Pi comes back up without any trouble on an x86 mini-PC.
What you check during this full restore: your users, your devices, your add-ons, your automations, and the backup configuration itself. If everything is there, you have just turned a hope into a certainty. Count on ten minutes, once or twice a year.
Monitoring your backups automatically
A backup that fails silently for six months is worse than no backup at all, because it gives you a false sense of security. The Backup integration exposes exactly what you need to guard against that, with the event.backup_automatic_backup entity and several sensors, including the date of the last successful backup.
First automation, the immediate alert in case of failure:
alias: Automatic backup failed alert
triggers:
  - trigger: state
    entity_id: event.backup_automatic_backup
conditions:
  - condition: state
    entity_id: event.backup_automatic_backup
    attribute: event_type
    state: failed
actions:
  - action: notify.persistent_notification
    data:
      title: Automatic backup failed
      message: >-
        The last backup failed:
        {{ state_attr('event.backup_automatic_backup', 'failed_reason') }}
mode: single
Second automation, the one I find even more useful. A watchdog that warns you if no backup has succeeded for 48 hours.
alias: No successful backup for 48 hours
triggers:
  - trigger: time_pattern
    hours: "/6"
conditions:
  - condition: template
    value_template: >-
      {% set s = states('sensor.backup_last_successful_automatic_backup') %}
      {{ s not in ['unknown', 'unavailable']
         and (now() - (s | as_datetime)).total_seconds() > 172800 }}
actions:
  - action: notify.persistent_notification
    data:
      title: Home Assistant backup
      message: No successful automatic backup for more than 48 hours.
mode: singleCome and describe your setup on the forum, we will help you get unstuck.
Open a topic on the forumConclusion: ten minutes to turn a hope into a certainty
Let's take stock. A daily, encrypted backup on the machine, first copy. A copy on the NAS, second medium. An off-site copy in an encrypted cloud. Three copies, two media, one off-site: your 3-2-1 rule is complete. Add a locked snapshot or a disk that you unplug, and you move up to 3-2-1-1-0.
My recommendation, no beating around the bush. If you already subscribe to Home Assistant Cloud, enable the cloud copy this very evening: it takes thirty seconds, and it is infinitely better than nothing. If you don't, or if you want a real off-site history rather than a single archive, an end-to-end encrypted cloud with a lifetime offer is clearly more worthwhile over time. And in any case, keep the NAS: it is the fastest copy to restore, and therefore the one that will save you most often.
That leaves the most important piece of advice, and it is the only one that costs nothing. Once every six months, run a real restore and check that everything comes back. Ten minutes of practice, and your Home Assistant backup stops being a belief and becomes a certainty. Your installation can then burn, be stolen or have its storage fail: you will no longer lose anything.
Setting up the three locations, the Internxt WebDAV add-on, and the complete destruction of my Home Assistant to test the restore under real conditions.
Watch on YouTubeThe best place to store your encryption key, provided you don't host it on the very machine you are trying to restore.