
Introduction
We've all experienced that moment of frustration: a light that won't turn on, a temperature sensor that no longer responds. After several minutes of troubleshooting our automations, the verdict is in, simple and annoying: the battery is dead. It's probably the dumbest failure in home automation, but also one of the easiest to avoid.
Today, I'm going to show you how to put an end to this problem once and for all. Together, we'll build a perfect battery management system fully integrated with Home Assistant. Our approach will unfold in two main steps:
- Creating a dedicated dashboard that will allow us to visualize the status of all our batteries at a glance.
- Setting up smart notifications to be alerted before a battery even dies.
Part 1: A dashboard to visualize your battery status
Good monitoring starts with good visualization. The goal is to create a centralized view that lists all our battery-powered devices, sorted by urgency. To do this, we'll rely on a very effective HACS card.
Why choose the "Battery State Card"?
Some of you might wonder why not use the very popular Auto Entities card. That's an excellent question. While Auto Entities is very powerful, it's also more generic. The Battery State Card, on the other hand, is specialized in battery management.
Its advantages for our use case are clear:
- Simplicity: It automatically detects and sorts your batteries by level, from lowest to highest.
- Immediate visualization: It color-codes battery levels to identify urgency effortlessly.
No complex code: No need to dive into complex YAML configurations with card-mod to get a clean and effective result.
For our needs, it's the quickest and most elegant tool.
Installation and basic configuration
Go to HACS and download "Battery State Card / Entity Row". Home Assistant will prompt you to refresh your browser. Click "Reload".
Go to your dashboard of choice, switch to "Edit Dashboard" mode and add a new card. You should find the Battery State Card in the list.
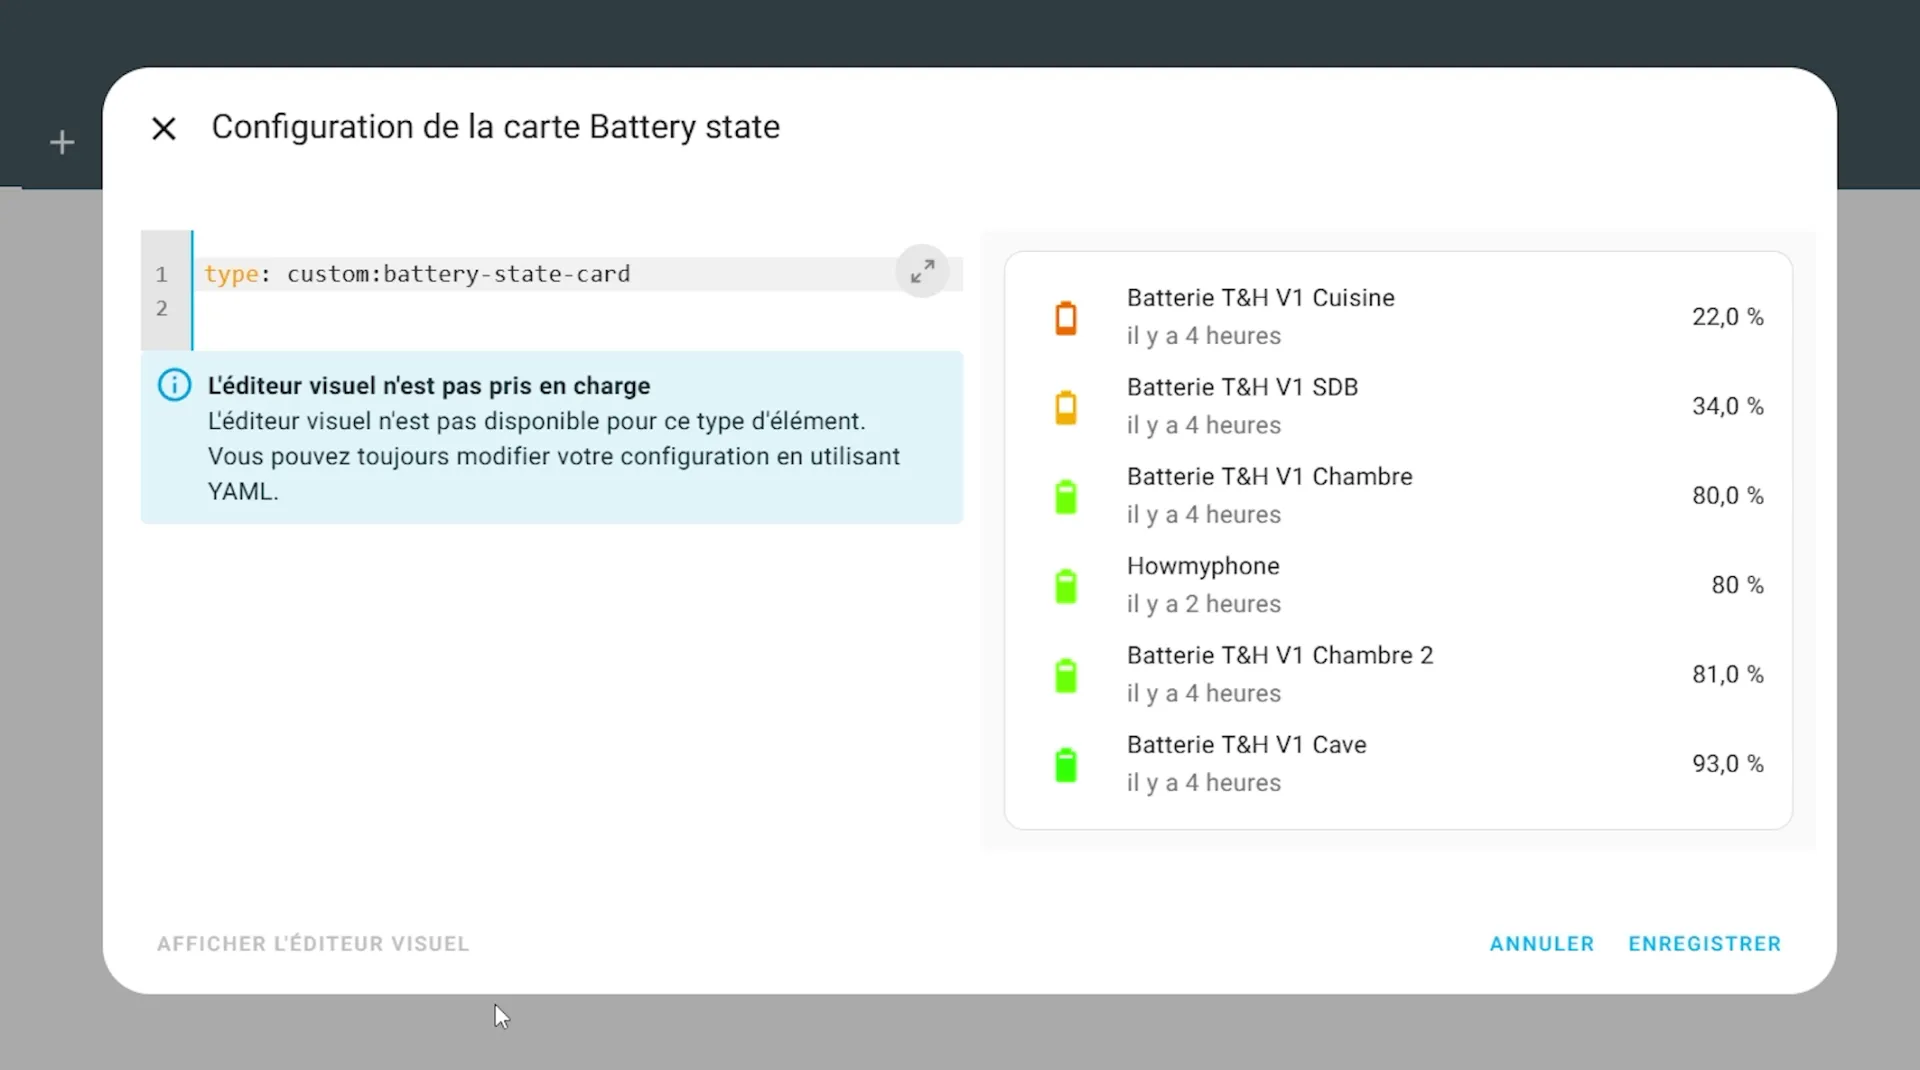
By default, the card already displays all battery-type entities in your system, sorted from lowest to highest charge.
This is excellent for a hassle-free setup. But we're going to completely customize this card for an even cleaner result.
Refining the display with YAML configuration
The default rendering is functional, but often imperfect. It includes irrelevant devices (like our smartphone), and lengthy names ("Living room temperature sensor battery", where "Battery" is redundant). Let's clean all this up.
1. Filter out irrelevant devices
To keep only the essentials, we'll first include all battery entities, then manually exclude those we're not interested in. The advantage of this method is that any new battery added to your Home Assistant will automatically appear in the list. Just like the default behavior, without configuration.
In this example, I'm excluding my phone. The asterisk * is a wildcard: it allows you to exclude all entities that start with sensor.your_phone_, which is very handy if you have multiple sensors linked to your phone or multiple phones of the same model.
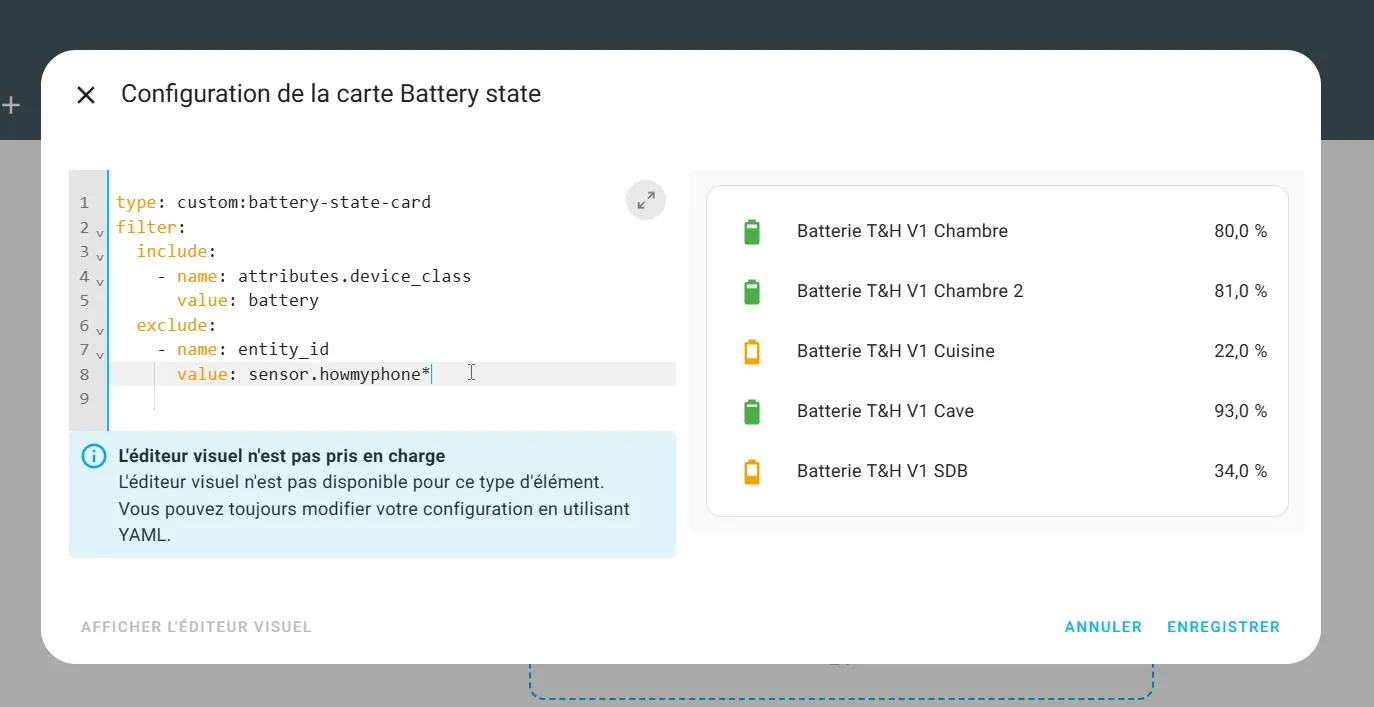
But of course you can specify the exact name of your entity to exclude.
2. Sort batteries by level
The filter can sometimes disrupt the default sorting. Let's ensure the lowest batteries always appear first by adding the sort directive.
3. Clean up sensor names
To improve readability, we can remove redundant terms like "Battery" or "Level" from each line using the bulk_rename option.
The "from" parameter will be used to select the text to replace. If no "to" parameter is specified, then the text won't be replaced (with the value of "to") but removed.
4. Add useful information
Finally, it can be very handy to know when the battery level was last updated. We can add this information below each device name.
And there you have it! You now have a clear, precise dashboard that only shows relevant information.
Part 2: Smart notifications to never be caught off guard
Having a dashboard is good. Being automatically notified is better. We don't want to check this page every day. The ideal solution is to receive an alert when a battery level becomes critical.
The "Low battery notification" blueprint, your best ally
For this, we'll use a fantastic blueprint created by the community: "Low battery notification and actions" by Blacky. It's extremely comprehensive and easy to configure.
To install this blueprint, simply click this link.
Click the link, confirm the import, and you're done.
Step-by-step automation configuration
- Go to Settings > Automations & Scenes > Blueprints.
- Find the newly imported blueprint and click on it.
The interface is very well designed and guides you through the options. Here are the essential points to configure:
1. The trigger: when to check batteries? In the trigger section, enable time-based checking. I recommend leaving the default: a scan once daily and selecting a time when you're usually available, for example at 6:00 PM. This gives you time to order batteries if needed.
2. Battery settings: threshold and exclusions
- Warning level: This is the threshold that will trigger the alert. A value of 15% or 20% is a good compromise.
- Excluded battery sensors: As with our dashboard, add here the entities you don't want to monitor (for example, your phone's battery).
3. The notification: who to notify and how?
- Device notification: Enable this option and choose the device that should receive the alert (usually your smartphone). I recommend not enabling the "all is OK" confirmation message to avoid unnecessary notifications.
- Devices to notify: Select your phone from the list.
- Priority (Android/iOS): You can also request that the notification have a certain priority or notification sound.
4. The smart action: add to a to-do list This is one of the most convenient features of this blueprint. You can add a button to your notification that, with one click, will add the replacement of the concerned battery to your to-do list in Home Assistant.
Save the automation, and your system is ready!
Conclusion
In just a few minutes, we've set up a robust system that solves one of the most annoying problems in home automation. Thanks to the combination of a visual dashboard and proactive alerts, you'll never have a bad surprise again. Your smart home gains reliability, and you gain peace of mind.
I hope this comprehensive tutorial has been helpful to you. The small translation work on the blueprint was done to help you, and the best way to support me is to share this article and leave a comment!
Feel free to ask your questions below or share your own battery management tips.


Je ne retrouve plus ce passage ayant vu énormément de tes vidéos, et tu avais dis faire une vidéo à ce sujet pour nous guider, mais je ne crois pas en avoir vu ...
Avec quel outil le fais tu sur home assistant ? car j'avoue que je vais devoir m'y mettre car je commence à partir dans tous les sens et galère un peu à retrouver les informations ou sources de tout ce que je fais.
J'ai du revenir sur ce tutoriel que j'avais fait il y a un moment, suite à l'intégration de nouveaux équipements à piles.
Merci encore à toi.